Heritage Shunters Trust
Restoration progress
I am going to attempt to show restoration progress and activities on our locos as this takes place; some of these photos will portray other activities on restoration days, The latest activities will always be at the top of the page, for older progress please scroll down.
2020
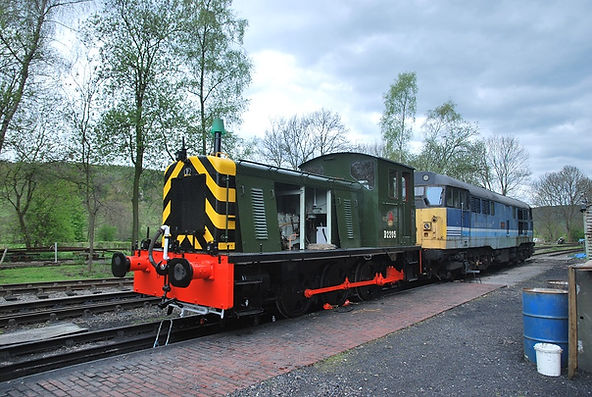
Saturday 4th Jan 2020 .After getting a request from Peak Rail's p.way department for the use of a shunter with a driver and secondman,for a few days, strategically to place the Works Train,on the running line where maintenance was to take place,Shaun reminded me that we have an infrequent, intermittent,fault on the 08 taking power in the direction it is set in.He suggested we looked for the obvious ,straight forward fix first which we did.Using a small home made rake and a paintbrush ,all of the debris,which had accumulated under the treadles was raked out as seen.A likely suspect for the intermittent fault was found ,which was a taper pin from under the left hand side treadle,along with much dust and litter.This could have been rolling about under the treadle causing it not to be able to move far enough ,to make a proper contact .Only time will tell of course if the fault reoccurs we will have to look for other potential causes ,but as Tony Howard often said,"This should be Hunky Dory now!"All the other checks were also made,coolant ,engine oil levels and anti freeze content.As the batteries had been linked up to our intelligent chargers she burst into life on the first attempt.No air leaks were noted and everything seemed to be working correctly ,.As for the splitpin we found two missing from the operating rod going between the brake lever and the brake valve.These have now been replaced ,but how they have become dislodged initially remains a mystery.


04/1/20 08016 is shunted out for the first time this year ,to have the (see above),work done on it.The battery box cover is still open and a battery charger can be seen on top of the battery box.The loco was put back on charge after being shunted back into the shed.This doesnt only keep the batteries charged but also helps to keep the batteries from getting frost damage.

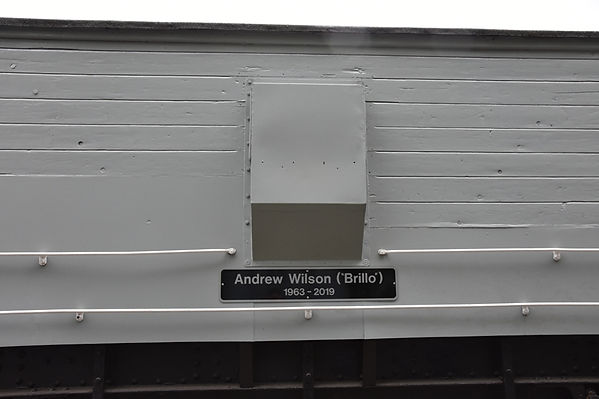
I18/05/19 another small piece of the jigsaw comes together.As promised to our PLEG colleagues and everyone else that knew him,we have named a Guardsvan after Andrew.Why a Guardsvan?well they run in every Gala we stage ,and the loco we would have picked is sidelined at the moment with cylinder head issues,this being the 09.This is not neccesarily the end of the story as the plates have been sized to fit the battery box covers of a 350 type loco, if we wish to transfer them at a later date.However back to the present ,its mind boggling to think that less than 18 months ago this van was a rolling wreck ,and has now been transformed into a useful working vehicle.There is still work to do on it,the cabin windows want replacing with shatterproof perspex that can be seen through!(The old ones are virtually opaque now).This was the first chance of a photo after removing its protective tarpaulin cover,but the less said of that the better!

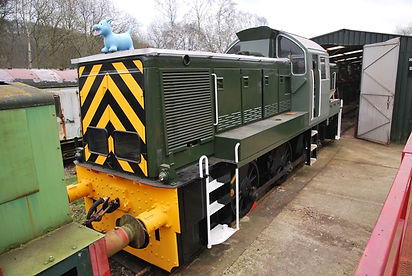
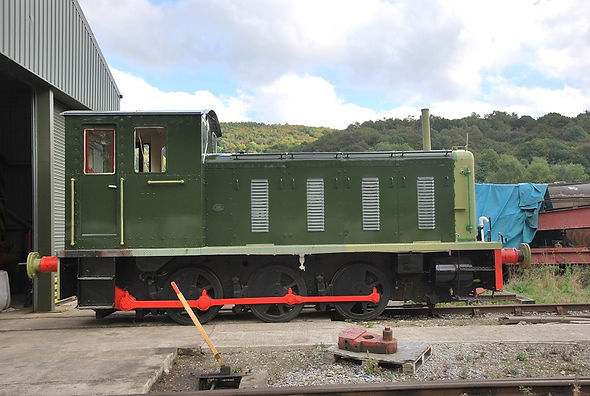
18/11/18 The 06, D2420 is having new windows fitted. The rear, plus cab door windows, and front windows are all be renewed. Although we try and do as many of the varied tasks ourselves, when restoring locos, there are times when its best left to the experts and this was one of them. The final locking beading is being fitted into a rear window. This sits in a channel moulded into the window rubber, locking the pane in place and hopefully stopping it falling out! Doesn't she look smart with the newly applied stripes/chevrons? It took me a whole two working days to mark these out on the front and back, using pictures of the loco in the 60's to do it from. Very tedious but necessary. Did you know (or would you want to?), that depending on the thickness of the steel on the bodywork of the loco, determines the section profile of the rubber mouldings to fit the windows into used? Also notice if you will the dull look, of the newly painted bodysides. This is due to the excessive amount of condensation in our big shed over the Winter months, so if you have an extra £50,000 to spare to insulate this shed, please let us know!! Van and myself trekked all the way to Exeter to inspect this electric scissor lift, pictured ,but it has proved to be invaluable and far safer than ladders when working at height. The only downside about this particular machine is that it can only be used on flat firm surfaces, but still a great bit of kit, which will lift its platform to about ten feet into the air.

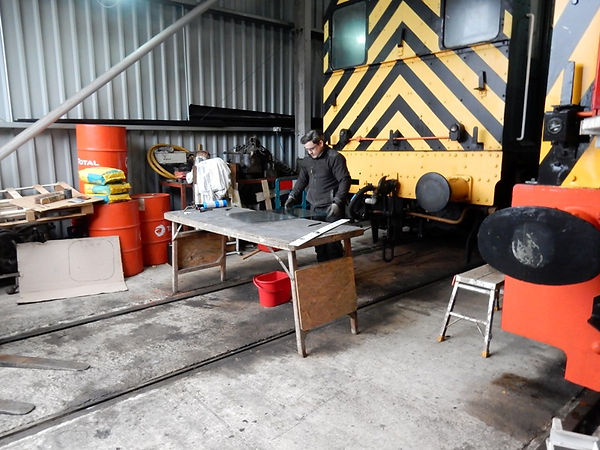
Scott, expertly cuts another panel of glass out of a sheet of triplex for one of the back windows. The method is; draw round the window opening onto a piece of cardboard. Lay this under a sheet of triplex and score over the line drawn on the cardboard. Sounds Easy? No, its one of those jobs that an expert makes to look easy, but scoring and cutting safety glass then dressing the edges is probably best left to the experts. You may be just able to see a pattern to the left of Scott's table.


15/08/18 D2289 Inside the Brightmore shed, having a spruce up for the Debut day on Saturday, 18/08/18. Although the Italian sun has bleached the red livery, we started yesterday lightly cleaning it with a "magic lotion", to try to enhance the paintwork for the enthusiasts to appreciate. And the magic lotion used? well what else but a light coat of Olive oil!!, I kid you not, I read about this recently and the fact that in days gone by, Italian state railways used this for restoring the sheen on their steam locomotives, so quite a time ago, but it does seem to work, and it is appropriate as the loco has only recently escaped from Italy!! Another job tackled yesterday was oiling the hinges and straightening the bonnet doors on this side, well she is debuting!!
28/07/18 Bigga in all her glory!! With nameplates newly fitted, and one of the newly refurbished aluminium skinned sliding doors fitted but still awaiting painting. This is the first time that Bigga has ever been seen in mid-Brunswick green, but it really suits her. Another novel feature depicted on this photo are the apostrophes around Bigga on the nameplate. I can't recall seeing this on any other, unless you know differently? The new wiring is now 90% complete, Dave (Our superb electrician), has promised to complete it within the next few days, then we can go for a start!! If it runs, all's well with the world, and if it doesn't I may be going to find my passport to claim diplomatic immunity in another country!!!

25/07/18 Shades of Leith Central!! For those who didn't visit this location at Edinborough, and as mentioned previously, this was an old terminus Station, converted into a Diesel Allocation point. Along with the multitude of DMU's, most of which were left ticking over, interspersed every so often would be a couple of 05's, or an 05 and 06, or the odd 08. The air was always thick with diesel fumes, but I can clearly remember being excited walking round here wondering how many shunters would be on that particular day. Sadly Leith Central and the 05's and 06's are no more, save for three 05's at other railways, but only at Rowsley will you ever be able to see an 05 cosying up to an 06 again, basically because there aren't any other 06's left. As you can see there is still some way to go with the 06, but doesn't it look well? It is hoped ,the loco will be ready to re-debut on a Gala sometime during 2019, so the thought of these two working together next year is a possibility, if Mr Jones can keep the 05 up to spec that is !! (All of these photos, courtesy of Chris Goldie.)
![IMG_20180725_140055778_HDR[1].jpg](https://static.wixstatic.com/media/3fb8a8_cbf0bad8e4954ca4b1210ef0693019e3~mv2.jpg/v1/fill/w_600,h_450,al_c,q_80,usm_0.66_1.00_0.01,enc_avif,quality_auto/IMG_20180725_140055778_HDR%5B1%5D.jpg)
![IMG_20180725_140124267_HDR[1].jpg](https://static.wixstatic.com/media/3fb8a8_70192e4e8cf148e4a37a20820547d30f~mv2.jpg/v1/fill/w_600,h_450,al_c,q_80,usm_0.66_1.00_0.01,enc_avif,quality_auto/IMG_20180725_140124267_HDR%5B1%5D.jpg)
![IMG_20180725_140139547_HDR[1].jpg](https://static.wixstatic.com/media/3fb8a8_1d167830762649ffa390cfdf1fdb1aec~mv2.jpg/v1/fill/w_600,h_450,al_c,q_80,usm_0.66_1.00_0.01,enc_avif,quality_auto/IMG_20180725_140139547_HDR%5B1%5D.jpg)
14/07/18 Just another day at downtown Rowsley. Working on this door outside as the weather is just too hot!! (Not often you can say that) Anyhow this is one of the doors for Bigga being reskimmed. Shaun has made the inset new rollers at the bottom of each door, and countersunk the holes for the brass screws to hold the skin on. Bob has roughed out the window orifice with an angle grinder with a slitting wheel on it, and that just leaves me to pilot drill the countersinks, put the screws in and finish dress the window orifice. These photos show the care and attention we try to apply to each individual part. Shaun has also attached a window strap to the inside of the sliding window, with an insert brass stud to hold the strap in the desired position. Still to fit are the grab handles to actually hold while opening a door. The 2nd and 3rd photos depict the new rollers inset into the bottom of each door which run on a rail and help the door to slide. They are also spring loaded, to allow for any extra clearance on the guide rails. (Yes I know, as clear as mud!!)


04/06/18 Rowsley Yard, at the dead of night, (19.20 actually), and a monster appears, as the full moon rises. No not a werewolf but our 05 (D2587) in all of its glory. After seconding a willing? recruit to our ranks who has had much experience working on bus and lorry clutches, while being rehabilitated at Strangeways (I may only joking about that the last bit?), he soon got his head round the vagaries of the 05, and seemingly much to the loco's chagrin, it may have to move under its own power again. Of course being the very obstinate 05 its Gardner 8L3 power unit was also partially seized, so no change there then. This has been dealt with by using liberal quantities of freeing oil and diesel down the bores after removing the injectors, and leaving it to soak. Doing this work we found that one of the injectors had not been seated correctly in the top of the cylinder head and had been blowing, presumably because the clamp holding it in place had not been secured properly. On a different note, we will also have to reseal the side windows into the cabsides after doing some much overdue restoration work on the window frames themselves, plus work on the conduit on the front of the loco, etc. etc. So all this means that sometime hopefully in the not too distant future you may see the driver wrestling with the controls, while it's working brakevan rides on a HST Gala. Watch this space as I'm sure this wont be the end of this particular saga to put one of these highly temperamental locos back into working order.
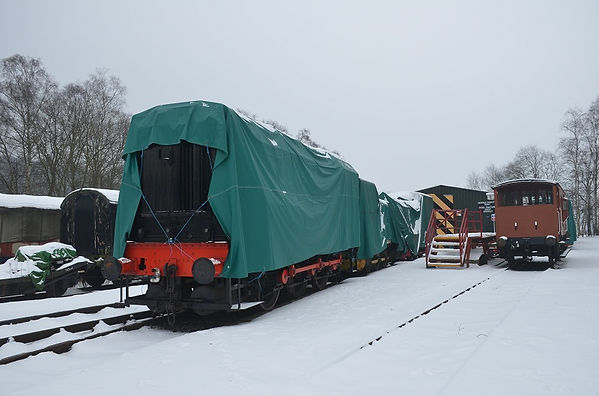
03/03/18 Not really any progress at all in this photo, but shows the conditions at Rowsley Central, outside our running shed with D3000 duly wrapped up properly to endure the hostile conditions.
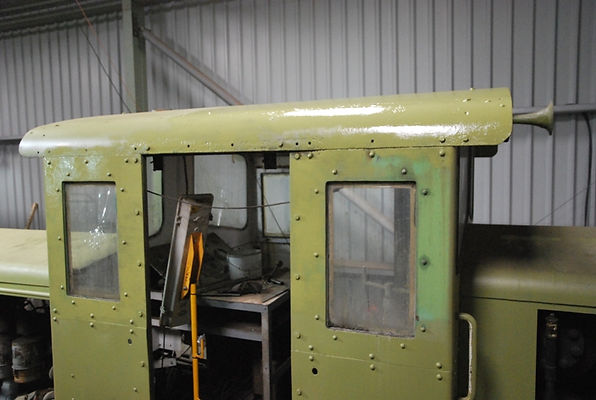
December 2017 & January 2018 Shows the side of the cab roof of Bigga, and the upper cab side in green primer after extensive flatting down and filling had taken place. Hopefully when the weather starts picking up in a couple of months we can start applying undercoat after the inevitable preparation again. The yellow fixture in the cab doorway is a 110 volt floodlight ,put in the cab for safe keeping.
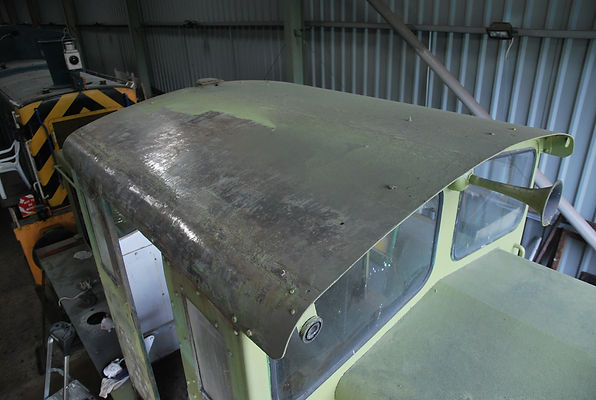
November and December also saw the start of preparing the cab roof of Bigga for painting ; by flatting down with a flapping disc on a 5" angle grinder and repainting into primer. There is a row of holes in the cab roof about 6" in, on each side these are to secure the small section angle irons to the cab roof which deflects rainwater to running down the cab roof and into the cab doorway.

November and December 2017 Work on Bigga. As you can see in the above photo work has progressed. The bottom strips have been welded in, flatted back, filled and flatted back, then drilled for the bolts along the bottom strip, nuts and bolts secured and painted into anti corrosive green primer. Please bear in mind this is for each side of the doorways and both sides of the cab!!

July /August 2017 After the June Gala, Bigga was shunted into the exhibition shed and a restart was made on its restoration. It tends to get shunted to the back of the restoration queue (Pardon the pun), but is an important part of our history and there were times in the distant past that Bigga was our only operational loco. Anyway enough of that as she is going to get a full cosmetic makeover, a rewire and other parts and systems upgraded as necessary. We have toyed with the idea of turning her out as a pseudo "ED" loco, probably much to the purists horror, in BR livery but as which one? well you will have to wait and see. Work on letting patches into the bottom of the cab that has suffered the most corrosion has also commenced.

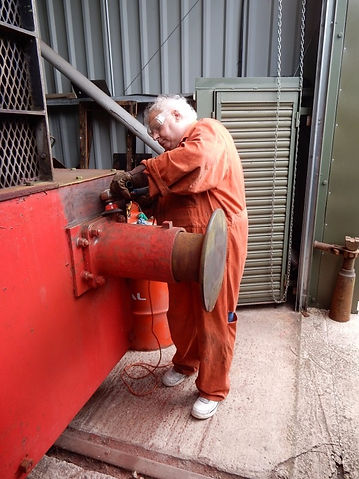


30/05/17 Nearly at the Gala now!! D2284, and our resident coaching stock expert, Harvey, has been seconded(Quite Willingly!), to apply the totem transfers to the sides of D2284. These aren't the vinyl, easy fix modern ones, but the original varnish fix transfers that have to be applied in two parts, as shown in the photo below. I also took the opportunity to apply the newly made cab side numbers, which aren't white as probably portrayed in the photos but a light ivory colour, as are handrails etc. I hope you will agree that the loco is getting to look quite spanking, and will look superb paired for the day with 03099, which is in weather worn blue livery.


28/05/17 D2953 Probably the first time the 01 has had a mention in this column. Corrosion issues have meant that some of the plate work on the back of the cab has actually moved slightly, causing the back windows to crack in their brass frames. As an interim measure, and as the 01 will be featuring in the 3rd of September Gala, the panes have been replaced as shown in the photo. Originally these were glazed with 6mm glass, bonded in with conventional putty. Of course glass isn't flexible at all, so to help with the problem, 8mm toughened poly carbonate (perspex), UV coated to stop it deteriorating in sunlight, with a 3mm gap all the way around in the frame and bonded with clear silicone sealant, to allow for the perspex to expand and contract, in the frames. The downside of this, being that its far easier to scratch than glass when cleaning, however using damp clothes only to clean should alleviate this. Thanks to Gary at Direct Plastics in Sheffield with the prompt help with these. (Reputedly housebricks would just bounce off these, but I hasten to add we don't intend to test this theory!!
As an extra thought, could you imagine anyone constructing a shunter these day with 3/4" thick, solid brass window frames??

21/05/17 D2284 after a judicial use of filler, then flatted back and primed and undercoated on the panels that have been replaced below the cab doors. Then masked up ready for the deep bronze top coat. All a bit of a rush, but the loco has to be ready for its re-debut on the 3rd of June !! (Traces of the BR totem transfer can be seen through the undercoat on the cabsides. This will aid the replacement ones. being located in the correct positions)


08/05/17 D2284 Burning the midnight oil(So to speak!), we stayed late on Monday, till Kieran the very nice young man who works for Peak Rail as his full time employment, could finish his shift and then start again by working a couple of hours for us. Its selfless acts like this that keeps the Railway preservation scene ticking over, but generally get overlooked, but not by us, Thanks Kieran!! He struggled a little with the Mig welding as there was a fair breeze, and as the loco was being welded outside Without going into the vagaries of mig welding too much, it affects the Argon Gas shield that is part of the welding process coming from the welding torch. However he overcame this and dressed the weld back after finishing. The next stage will be a coat of green anti corrosive primer, then some filler, and probably more filler between sanding to make it look nice and flat ,but thats for the future...
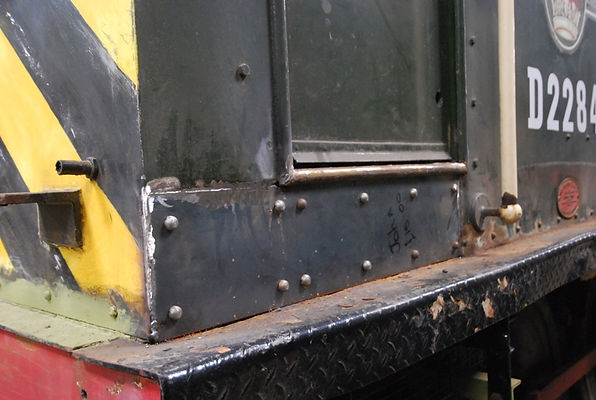

07/05/17 D9525 Another big step forward was taken Sunday, as the fault was found on the starting circuit. Dave ,our very knowledgeable electrician along with Matt King, one of our bright hopes, who is also extremely knowledgeable, and who doesn't get down that often due to the logistics of where he lives (40 miles away), upgrading his new to him house, a girl friend and all the other distractions of being a young man, found one of the wires had been numbered incorrectly, and attached to the wrong terminal, creating a constant live feed of 18 volts going to the starter solenoid, which as it was constant didn't stop feeding when the finger was taken off the starter button!! As the starter motor is 110 volts it's a mystery why a mere 18 volts kept it going, but there again if I knew the answer to this I would be an electrician instead of a general dogsbody! Anyway suffice to say that we can rest relatively easy in the knowledge that the starter motor isn't going to self destruct again when the button is pressed!! Seriously thanks to you both for a job well done.
06/05/17 D2205 The handbrake has been very stiff winding it on and off.At first I suspected the brake linkage in general but as its working fine on the air brake, and it has had a liberal dosing with diesel and then lubricated with oil and grease, I realised the problem probably laid with the handbrake mechanism. This can be readily accessed inside the rear of the cab by taking of the cover plate as shown leaning up at the side of the handbrake column, and removing the small floor hatch. Its a very simple arrangement and just like a bicycle chain with a sprocket at each end activated by spinning the red"ships "wheel. The chain can be just seen running vertical in the column, in the left hand photo.
The right hand photo shows the mechanism under the floor which is a round bar attached to the lower sprocket which winds backwards and forwards by the means of an acme thread (square section), on the rod, which runs through a square block with the same internal thread form. The block is attached to the linkage of which it pulls or pushes, depending whether the handbrake is being applied or released. I know that's all as clear as mud to describe!!, Anyway all liberally dosed with freeing oil, diesel, cleaned then oiled and grease nipples either cleaned out, or replaced with new ones and fresh grease applied.


06/05/17 D2284 The new steelwork has now been fitted today by Bob and Shaun. The plates are held to the framework at the back, by nuts and bolts ,with the heads machined by Shaun, to look like rivets to match the rest of the cab sides. Bob has already tagged or tacked the panels in their final positions with the MIG welder. The hole patterns and the shape of the plates was determined by making cardboard templates first and transposing onto the new steel plates. The loco had also had a collision with an unknown object (wagon?), a long time ago, as where the two holes are on the bare steel plate (to the left handside of the lower side of the door aperture), there was at least half an inch of filler. This is why you may be able to notice a small plate of existing steelwork, above the new plate, which had to be cut out and removed to be straightened and replaced in its original position. Now the repaired steel work has now been weld prepped and tacked into place, its awaiting someone proficient in continuous vertical MIG welding to finish the welding, dress the welds back and then the back of the loco can be totally repainted, to match the rest.
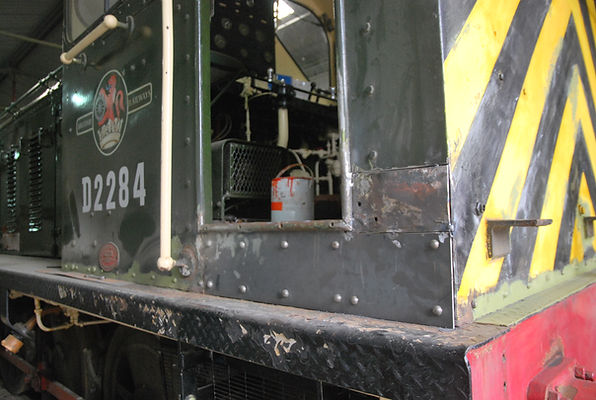

3/05/17 D2205 I decided that now the better weather is with us ,I would get the loco over Peak Rail's pit to do some work on the brake rigging and more importantly the axle boxes ,and the lubrication pipes to the same.
1. The loco is shown stationed over Peak Rail's pit.(We don't have one yet),before the work could commence.Its impossible to do this kind of work under a loco without one.This photo doesn't show it ,but the ex Stocksbridge Steam Loco ,which is very easy on the eye ,even to a Diesel enthusiast,has been parked in front of D2205 for ash disposal and servicing ,so effectively sandwiching the little diesel in.Oh! and 2205 made its way round( with the relevant paperwork filled in,) unaided from our exhibition shed.
2&3Show a shot looking up from the pit,with the fly wheel on the end of the engine can be seen.in the centre lower of the photos can be seen the old lubrication pipes ,which haven't done too bad as they are the original one fitted some 60 0dd years ago!!
4.Pipes into the top of the axlebox ,where the white metalled bearing sits on top of the axle.It can just be seen behind the lower lubrication pipe.The cube on the end of the rigid pipe,screws into the top of the axlebox(1/2" BSP),and the rigid pipe are threaded on the end ,and screw in at 90 degrees,also on the block.The large "cruddy" item on the lower left is the axle.
5.The flexible pipes are held onto the rigid pipes( with jubilee clips ),and are shown at the opposite end actually connecting ,on the photo ,directly onto the axlebox.
6. Two of the old pipes laid out on the floor ,to show the different components that make up the whole.a very greasy figure 8 clamp can just be seen between the pipes.There are 6 axleboxes ,so 12 pipe assemblies (2 to each axlebox),needed removing ,stripping into component parts ,cleaning and reassembling with new flexible pipes.
7.an axlebox with wool wicks that draws the oil up from the reservoir ,and into the tubes ,where the other end of the piece of wool sits.(Victorian engineering at its best!!)
8&9 Photos showing the rigid pipes ,and assemblies cleaned up befor reassembly with new flexible pipes.
N.B. Some time in the future the loco will have to be jacked up, and the bearings removed for cleaning and inspection and new lubrication pads fitted.
AND THATS WHY THERE HAS BEEN NO RESTORATION REPORT FOR A MONTH!!
1
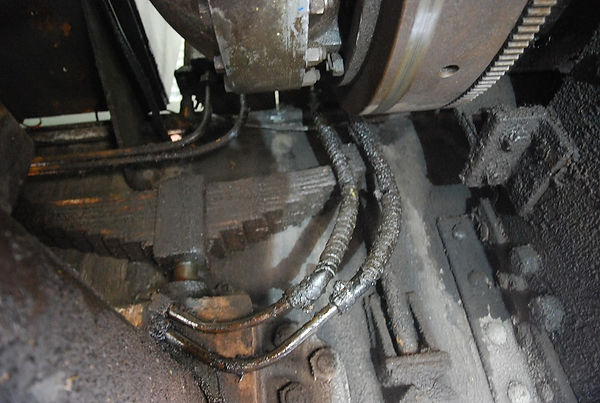
2
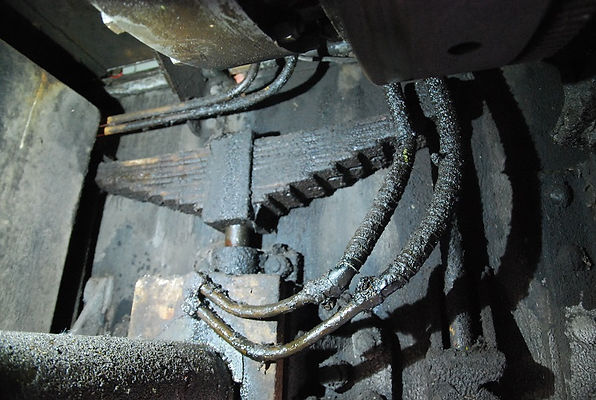
3

4
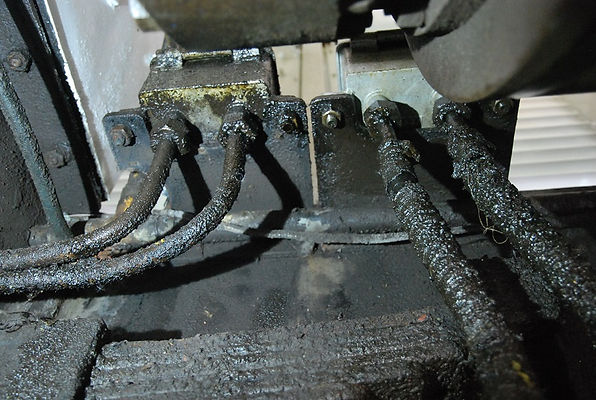
5

6

7

8

9
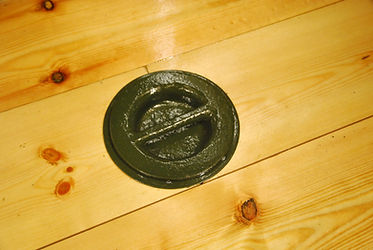
01/04/17 D2205 Another little job completed was installing the rings on the cab floor for the sand box filler lids to sit on. The rings are new but the sandbox lids have been cleaned up and painted (See photos below). The loco has also had a new whistle chain fitted, in the cab, (photo to follow).
D9525 Not all good news I'm afraid as it was found that the frames or as they are called the brush boxes have suffered some damage as have the brushes and wiring to the same when the starter motor stuck in on the initial start (See below 11/03/17). I am told by those that know that the starter motor is one of, if not the biggest, "Achilles heel " on the class 14s. The starter motors are of origin, a 24 volt design, but were up rated by rewinding up to 110 volts to presumably put them up to the power rating of the auxiliaries ,eg Revill exhausters which also run at this voltage. Unfortunately as the working parts were not beefed up also, its left them somewhat of an accident waiting to happen. The good news is our ever resourceful men on the job, are determined to get round this problem, even though spares for these are just not available, the words "Hens Teeth", springs to mind!!

1/04/17 D2205 The deadmans pedals have now been positioned in their respective sides of the cab and secured to the wooden floor.Great stuff, somewhere handy to put your feet when driving!!

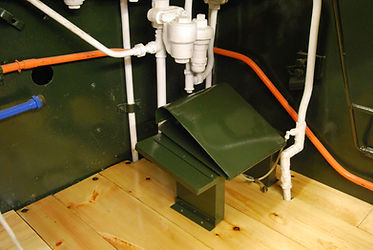
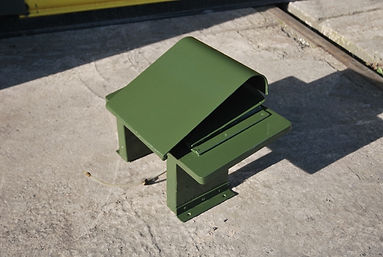
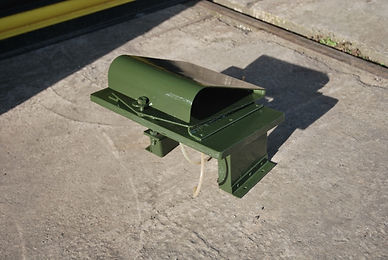
18 - 25/03/17 D2205 Spent the week refurbishing the deadmans pedals for re installation in the cab. The top part is hinged so when pressure is applied by your foot when driving it releases a valve and allows brake pressure to be released before the loco will move. Predictably the hinges on these were seized up but the return springs and valves were okay after cleaning. The wooden bases are brand new using the old bases as patterns, and also the brackets that secure these in position to the wooden floor are also new, also to the original pattern.
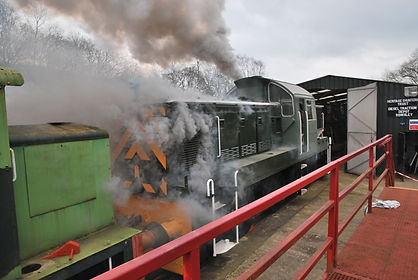
11/03/17 (PM) D9525 was shunted outside by 08016, to go for a start. All the checks possible had been done ,but even with this work preceding it's start and the lucky mascot on the bonnet,n sometimes things don't go just according to plan, as you will see from the sequence of shots below........
1. Shunted out ready for firing up (Literally)!!
2. Yes still looking pretty normal considering it's layover
3 & 4. Let the smoke screen begin!
5. Trying to mimic being a steam loco.
No, seriously by this stage the starter motor was stuck in the engaged position, the compressor wasn't making nearly enough air, and the engine shut down but was still powering round by the starter motor. An emergency shut down had to be made, oh well there is always next week. Worryingly the starter motor had become very hot by the time it was stopped, so this will have to be checked over as well.
1

2
3

4

5
04/03/17 D9525 Shaun checking the oil level in the compressor, while Bob checks the pipe joints for being tight, in "B" end. After spending a couple of hours in "A" end, taking details of the none standard threads and fitting of a missing pipe which is used to water-cool the Turbo charger, from the main coolant system. They discovered much to their joint chagrin why its still missing..............Because it's almost impossible to get to!!! This means actually getting in the other end and threading yourself round pipes and brackets to get to the location of the missing pipe. Oh! and its as dark as a black bears armpit--I hope this phrase is politically correct!!. Not too easy for even sprightly senior citizens. They both said they were glad to get back into the daylight! If we wanted to go caving we would go to Castleton!!

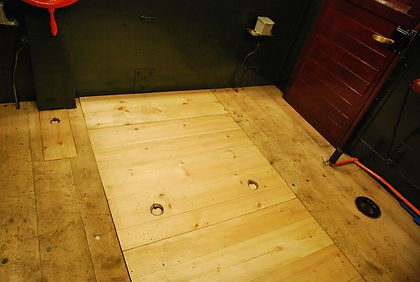
01/03/17 D2205 After burning much midnight oil the hatches for the middle section of the floor have now been constructed, and trial fitted as seen (These are in the lighter looking wood ). Don't know how they went on in the "old days", but the amount of woodworking tools necessary to do a job like this properly is legendary. I even resorted to borrowing a chop saw with associated stand off my brother to cut all the planks square on the ends, and to get the lengths exactly right. This is apart from hand planes, electric plane, circular saw table, circular handsaw, electric router (What a tool!), sanders, wood chisels etc ,etc!! The only original parts are the steel ring pulls, which are bolted through the hatches. Now all that remains to be done is to sand the whole lot down, and then coat with at least three coats of varnish, hand sanding the whole lot down by hand with fine wet and dry glass paper. As much of the floor as possible will be prepared and varnished off the loco to cut down on the dust and over painting. The left-hand view is looking towards the rear of the cab, and the right hand view towards the front .


D2284 as she looked after a make over in 2004 -- Read below how she will be back in this condition presently
18/02/17 A real "red letter" day for the Saturday gang!!
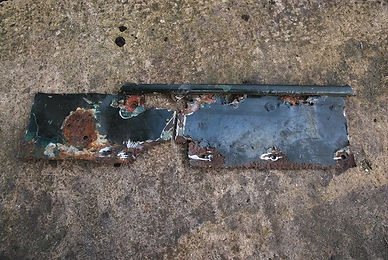
D2284 Don't know what it is about these 04's, but they sure like cab corrosion! The photos below show Bob commencing to cut out the rotten panels, from under the cab doors. This has also resulted in the rear most cab handrails being removed, as the corrosion was round this area as well. He was ably assisted by Shaun and Brian, with much effort being expended knocking the old rivets out of the holes in the angle iron framework. The removed panels are shown and I think you will agree, ready for replacing.Up to now, they have managed to do this work without removing the wooden cab floor, but without trying to sound like a prophet of doom, whether this work can be completed without removing it remains to be seen. As in the case of D2205 both new panels will need drilling for the bolts which will be machined with domed heads to look like rivets. They will of course also have to be welded around the edges where they meet the existing edges to the cab sides. At sometime in the distant past a repair was carried out to the top of the corroded panels using filler, and the Sport Section of the Sheffield Star Newspaper!! Although the date couldn't be seen, I could read a snippet about a former Sheff Wed. manager assessing his named players for fitness, so Brian (Who is in the know), is going to do a bit of research on the net for the period in question. Time Team have nothing on us!!
D9525 After discovering last week, by doing preliminary checks before attempting to start the loco, it was discovered that the reason the compressor didn't run was the fact that, the brushes were missing out of it. A hasty call To Dave Hartley at the Nene Valley Railway on Monday, resulted in a new set dispatched, and delivered to my home only two days later. Having known Dave for over 25 years, I can say, he is a really nice modest fella, a true professional and one of the unsung heroes of Diesel preservation. Thanks Dave! The brushes were duly fitted by our Dave the electrician, and the compressor then motored round like it should. The next job is to check the water system for leaks, by filling it up with water, and if it's water tight, draining the water and then adding coolant to fresh water. The oil levels will also need checking in the engine, compressor and exhauster, turbo, etc before going on to the next stage, which may be starting, but we don't know yet. All this progress in one day!! For a change I was fitting the cab floor in D2205, and have made a start making the two fixed hatches for the center section of the floor.



17/02/17 So after a more than brief sojourn over the English channel to far away lands, here we go again!! D2205; shown below are photos of the cab again, and now showing progress on it's new floor.
This is made up of three separate sections. The planks for these run from front to back. The four photos below show the sides which are fixed in place by coach bolts. The wood has been "sized" or machined to the required section as planks. This has got to be correct at six and a half inches laid. To explain; if you were to put three boards together with the tongues in the grooves, measure from one board across to the next and the above is what it should measure. They also need to be one and a quarter inches thick. No scrimping with these sizes I'm afraid, as if you don't use the correct section wood, the bolt holes don't fall in the right place, or too thin and there will be a gap under the door etc. as we are talking imperial sizes this has to be specially machined, so no chance of finding it on the shelf at B&Q or any other diy outlet. This is reflected in the price, which is "eye watering", (read down right expensive), So the reason for mentioning all this is TIME!!....Time and a great deal of it to fit it properly, without too much wastage, (Bear in mind, a specific amount has to be ordered initially to do the whole floor). Fitting around pipes, sand filler caps etc, and to fit neatly end to end, and to also of course able to fit the tongues into the grooves, at the same time, No it's not plain sailing!! It's taken me now almost two months, of the days I spend at Rowsley to fit the sides, and I haven't made the inspection hatches for the middle section yet. By the way the missing part "plank", shown in the bottom left hand photo is a removable piece to give access to the handbrake linkage, which has also not been made yet. Well nobody said it was going to be easy!! Oh!, and just to add to the misery, the wood has started to warp and in some places crack, so it's a case of selecting the best we have left to actually use.


28/01/17 D9525 As Bob said "Not a lot of work but a great step forward",,,but I'm sure you will be enlightened, if you read on;
One of the main battery cables was extended by 15" by using a connector to be crimped between the two ends. Lugs were crimped on the ends of the cables to bolt to the battery terminals. The holes in the connector and lugs for this job are 3/4" in dia, and the crimping tool used resembles a pair of bolt croppers with 20" handles, so a two man job. One guy to hold the connectors and cables in place, (With fingers safely stowed away!!) and the other to operate the crimping tool. (Dave has checked he still has all his fingers).
The Class 14 has two banks of batteries, one either side, so there are four battery connectors to make. A positive and negative, and a cable to connect the two banks together. After establishing that there were no shorts anywhere, the circuits for marker light and interior lights were tested and proved sound. The test positions for the Exhauster and Compressor were tested. The exhauster ran ok but the compressor didn't, and on investigation, it was found there were no brushes in the electric motor driving it. Before an attempt is made to start the power unit, oil and coolant levels need to be checked.
12/01/17 D2205 Fitted the new left hand seat, and arm rest. How long to do this?? All DAY !, as I had to get the window to slide properly first. The reason for this being to use the arm rest the sliding window has to be fully open, then the arm rest hinges into position in the window orifice. To get the window to slide, merely dismantle the runner under the sliding window, (4 times!), then polish the runner with an angle grinder, fitted with a flapping wheel which took a small amount off the surface of the runner by polishing it. Second view shows sliding window fully open, with arm rest hinged into position. Right hand side not started yet !


17/12/16. After putting all the locos back in their places in the week after the shunt round for the funeral, we had a good end of year tidy up, and then to some initial dissent had a 2016 Saturday Gang group shot with the camera on self timer that has been likened to "an identity parade photo on Crimewatch !!", but you decide? Above all else, Have a very Merry Christmas from us all at HST.

Andy Brian Bob John Shaun Van
07/12/16 As mentioned in our news section, we lost a much loved colleague on the 10th of November. It transpired that Ian had mentioned in his will his preference of having a Railway oriented funeral. With assistance by the funeral directors and Peak Rail, Ian's funeral service was arranged to be had on our site at Rowsley. The service took place in our running shed, with seats placed around the brakevan that had brought Ian down from the other end of our line. Behind the seating as a very appropriate back drop was the superbly restored D9525, which Ian owns. His family members attended, along with all of his friends from HST and also Barrowhill, infact we also had the MD of HNRC, Harry Needle, all mates of Ian's who was a really great bloke. As Ian had a personal interest in D2205, we decided to go into overdrive and get the loco looking something like finished to be in the funeral train. As you can see much midnight oil has been burnt over the last couple of weeks getting it ready, but I think you will hopefully agree the efforts were worthwhile. We had planned to run this with D2854, owned by Shaun, a great friend of Ian's but sadly neither 2854 or 2205 would build air up on the day prior to the funeral, which was on the 6th of December. We resorted to pulling the train with 08016, with D2205 accompanying the brakevan conveying Ian. As a mark of respect no photographs were taken of the funeral train. As an aside I would like to thank on behalf of all of us, the magnificent wake/buffet that Karen put on in Rowsley South Station Buffet, and also Peak Rail for their full co-operation and sympathies, and agreeing to all of our requests, Thankyou!


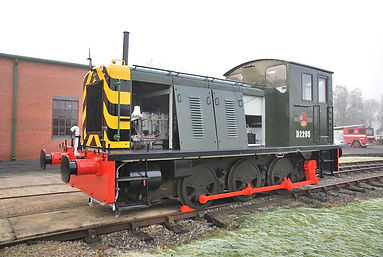
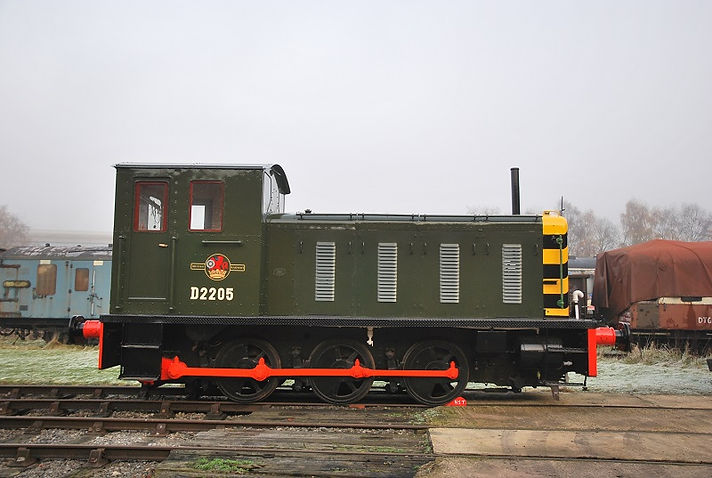

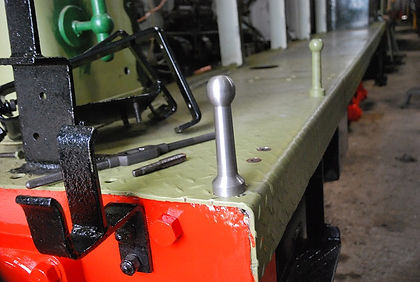
5/11/16 D2205 Showing the new hand hold knocked up by Shaun on our lathe, which is an exact copy of the one in the background. We are very lucky for a small group, having such a broad spectrum of skills between our working members. Incidentally for those of you who have viewed previous "before shots" on these pages, this corner had suffered extensive damage, probably done by trying to shove a vehicle without buffers and using a piece of wood, placed against the hand hold and bridged across to the other vehicle. (I have seen this done before!) The end result being it rips the hand hold out of its mounting taking part of the bufferbeam where the handhold is screwed into it, with it.
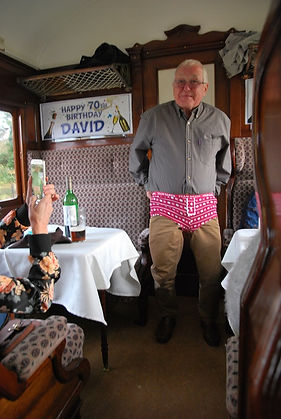
14/11/16 Dave Thompson, our new (Superb) electrician wrestles with a pair of superhero pants, on his 70th birthday celebrations in the LMSCA coach he had chartered for the afternoon at Peak Rail for invited guests, or should that be gussets? You decide!! Anyway suffice to say the coach rides better than any Mk 1 (but you decide), and the party was really great, including a hot buffet next door . Suffice to say, when Dave got off the train he had the next four hours in the pub!, so whether he was wearing anything at all when he got home is open to conjecture!, Whether this should be headed under preservation progess is also for you to decide!!
29/10/16 Work continues on D2205 the two photos below show an extra steel strut added on each side of the floor in the cab, to properly support the tongue and groove flooring ,when the new floor is fitted. Although BR were nearly always very astute with their design work, the original floor had a batten screwed up underneath the joints of the floor boarding to support them!! To be fair on BR it was Vulcan, who carried out this work, as it was constructed at their premises at Newton le Willows. The steel strut is designed to be removable, to leave open access to the sandbox which can be seen directly underneath it. The first view shows a floor board trial fitted to determine the position for the strut.


23/10/16 D2420 Photos supplied and of the "Sunday Gang" in action. All the shots centre around work done on the connecting rods and pins, plus on testing the engine thermostat for correct operation.

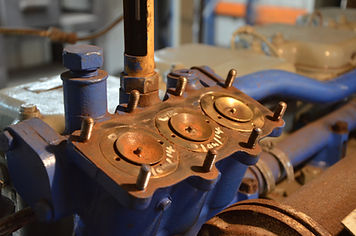
The first photo shows the thermostat housing removed, so Rob shown in the accompanying photo can heat the thermostat up to determine what temperature the thermostat opens at.
Getting the thermostat to open at the right temperature not only keeps the cab heaters nice and warm when on, but also keeps the water at an optimum temperature while circulating round the water jacket around the engine, which is slightly more important!!

Team Leader, Toby Hill examines the bore for the crank pin to connect the rods together .The crank pin can be seen next to the copper hammer in the left foreground. When he has decided everything's okay, he will allow his "helpers", Ralph (His Dad), and Gary his other helper to fit the rods! The coupling rods do exactly that, they couple the wheels together to increase the traction or grip on the rails when pulling loads. All the traction comes from the back rod which is moved by the final drive, situated behind both sets of wheels. So all the pushing or pulling power comes from the back connecting rod, which is moved by the flycrank situated on the final drive. I know it's all as clear as mud!! (Only joking about this as well, and I will probably have some abuse about this as, as Toby is the Junior, and Gary and
Ralph mentor him!).
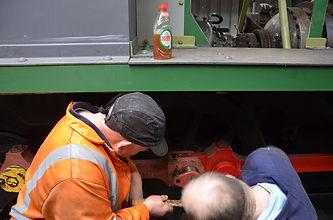

After a team brief from Toby ,his two helpers are allowed to proceed with fitting the pin that connects the two rods together,under Toby's watchful eye of course!!another rather important step towards the 06 moving under its own power again.
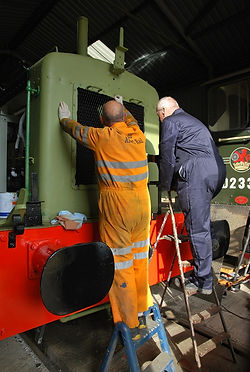
22/10/16 D2205, Two of Santa's little helpers taking a day off from making toys!! (Only Joking, I know i will get some stick for this comment!!) Aka Brian and Van starting to pick the black parts out, including the grill at the front of the radiator which are notoriously hard to brush paint due to the expamet mesh used, which because the diamonds in the pattern are twisted its not flat to paint.


13/10/16 D2205 A rail guard. This attaches to the frames of the loco, there are four in total, two at the front and two at the rear. These hang down about 75mm from the railhead the idea being that these will push any large obstruction out of the way that is too small for the bufferbeam to dislodge. These are about 30mm thick and weigh heavy!! Made and bent at the profilers there wasn't sufficient bend in them, for the nose of the railguard to be over the centre of the rail head, so a packing was made to go behind. Both components marked up as RF, in the photo.
15/10/16 Further photos of the rail guards after trial fittings to the frames, before removing again for painting. It gives an idea of how these are fitted and why. I didn't manage to get any more shots today, but thanks to Andy Wilson for journeying from deepest Bradford, to help Van Bramall clean and paint the fly cranks and coupling rods and also making a start on painting the front and rear buffer beams again.


04/10/16 D 2205 Doesn't a coat of paint make a difference? The overall green colour seems to accentuate, just how small the wheels are on the early series 04's.
1/10/16 Not wildly exciting but two days of solid effort moving these up the shed in sacks and emptying them into trays and storing them in the racks that we had built up. Two main benefits ; this frees a lot of storage space up and you can find the nuts and bolts you are looking for quite easily.


29/09/16 Young Rob bolts back up ,all the fuel tank supports,after the gearbox has been reunited with the
Class06 ,D2420
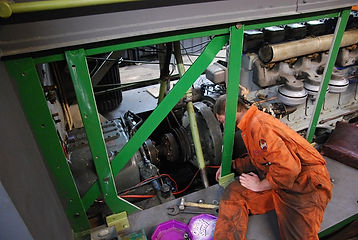
29/09/16 all of the step is now fabricated and trial fitted before finishing the tabs that secure it to the radiator grill.

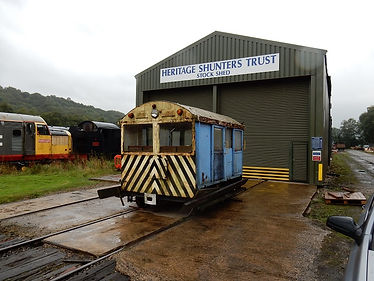
22/09/16 Another job that has been ongoing for a couple of weeks is the fabrication of the front step above the buffer beam on D2205. The original one was totally missing so I copied, (very nearly) the one on D2229 which is almost identical to the one on D2205. The photo depicts it trial fitted, not fastened down yet, and the piece of chequer plate has still to be bent on the two small edges. Just keep plugging away until you get there!!
03/09/16 A very damp day! Unfortunately, this was the date selected for recovering our Wickhams trolley from the depths of Peak Rail's storage sidings, for some long over due TLC. The Wickhams seems to get overlooked in the grand scheme of things, but this shouldn't also be so. It doesn't run now, so four of us used much muscle power (or as much as you can have at our age!!), to push it onto our shed area, made all the more welcoming by the deluge that started. Oh well phase 1 completed.................!
The afternoon was spent fine tuning the engine room doors or to be more precise, getting the 4 locks on each door to lock properly, by filing a lead on the edge of the tabs, of the door locks. Bob and Shaun finally narrowed the major air leak down on D2205 to the forward and reverse cam under the control lever which had become displaced from the cog it drives (Photo to follow). Because of the very restricted access under the drivers desk, a spanner had to be shortened on the handle first, to undo the securing nut. Needless to say it is a very time consuming job which they intend to carry on with on our next working day. It's a source of wonder to me how they found this fault in the first place?!! Van carried on painting, ably assisted by our latest new member Brian (Welcome to the fold,Brian ), who seems to be enjoying it, which after all is what it's all about.

24/09/16 one of the highlights of restoring D2205 was looking forward to the application of deep bronze green on the loco, which started today with the front of the cab and the bonnets over the engine getting the first coat. To say it is transforming the loco is an understatement!
It wasn't really possible to get photos of the sterling work that Bob and Shaun have carried out, over the last couple of weeks, but this has entailed tracing some really elusive air leaks that was stopping the loco building air up properly. This centred round the forward and reverse valve (I have mentioned this in a previous report), found to be not mounted correctly on it's shaft and also unsupported properly which Shaun machined a part to correct the fault. We had to remove this valve, from under the drivers desk, for the work to take place and a sliver of steel mistakenly thought to be a small woodruff key was gently tapped out with a hammer and punch, and found to be part of a tang of a file that had been snapped off between the drive gear and its holding bracket!. The worrying part for me being this "work" had been carried out at the West Somerset Railway, what more can I say? all's well that ends well and after this very laborious work, the controls work properly, the loco runs like a little sewing machine, charging it's own air quite adequately to operate at working pressure, and moving very smoothly under it's own power for the first time in twenty + years. It's hard to recognise it as the same loco that arrived some 4 years ago at Rowsley.


29/08/16 Bank Holiday Monday!! One of the reasons to go down, was to make sure we had cover, if we had any visitors wanting a look around. There were so job well done! The other reason of course was to carry on with the mulititude of various tasks which need completing till the loco is ready to wheel out. Van decided he was going to give the loco a good clean prior to more paint being applied, and i carried on fitting small parts which look pretty insignificant but they all make up the whole.
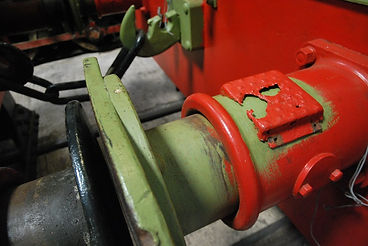
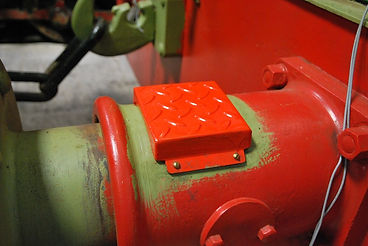
1. Van Spring cleaning 2 & 3. I think they are called weatherstrips? (See Arrows), I fitted these to both doors, and had to drill pilot hole thro the steel skins before, securing them with the appropriate brass slotted screws. (As the rains runs down the door it's deflected by these from going under the door.) 4 & 5. Before and after; Buffer step, or that's the name I have given them. photo 4 looking a little moth eaten!! A compromise was made as it wasn't really possible to get the correct pattern on the top of the new one. If it looks out of place alongside the opposite one, I will change that for a new style one as well. These are secured by 2 BA brass screws, the originals were secured by a very odd kind of rivet which was split on the end and had to be driven into the appropriate hole as you would a nail. (Hope this makes sense!) all little jobs which seem to take a large amount of time.

1

3


2
4
5
27/08/16 D2205, About the most interesting photo I could take of an air leak! The lower piece of pipe is the one that needed replacing as evidenced by the hole. Where the hole is situated is the where the pipe goes through the front stretcher frame, so it has been chafing for a considerable time. The puzzle is how did it hold air when we first tried the loco? We may never know!! Thinking that was the end of the problem after we had shortened and threaded on both ends, the replacement piece of green tubing (11/4"bsp), we reassembled it, three of us!! one positioning the pipe above and two under the loco, persuading the new tube to screw to the existing pipework below.
After all that the loco is better, but still not making or maintaining the correct pressure, so "back to the drawing board" on our next work day, on this old lady!
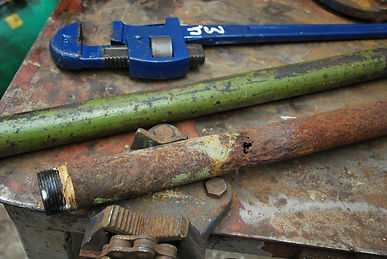
P.S.Did you know that Bsp, abbreviated from British Standard Pipe, is measured from the bore of the pipe I/D, and not the outside diameter of the pipe?
Yes we are full of "gems" such as this, which will help to cure anyone's insomnia!!
24/08/16 No report last week as much of the activities was taken up with tracing air leaks/faults in D2205. As for today, which as you probably know was the hottest day of the year so far; first job, shunt the loco outside as the tin roof of the shed just makes it even hotter! Van spent his time painting/touching up all pipework and superstructure that will be hidden when the new floor goes in the cab. I spent the majority of the day fitting the new bakelite tags on the control desk in the relevant places. I utilised as much as possible the original holes, but where a self tapping screw had broken into the hole in the distant past, before our ownership anyway, I found it impossible to drill these out so then had to drill new holes in the desk. I could expend probably reams of paper (if I was writing ), explaining the intricacies of drilling the tags with offset holes to match the holes that the apprentices, as it would have been, didn't always drill the pilot holes in the right spot in the desk!
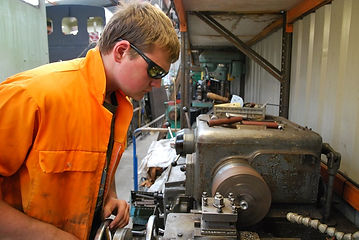
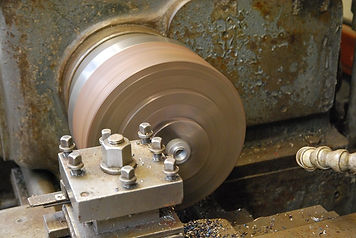
" Young Rob " turned up in the afternoon, to machine/face off some nuts which are needed for D2420's gearbox. We have a very nice Dean Smith & Grace centre lathe on loan to our group,
(Thanks James), which is basically the Rolls Royce of lathes. It's used most weeks and never lets us down. I hope you find the accompanying photos interesting;

D2205 Sunbathing today!! Phew !

Van (Evander, touching the paintwork up under, where the cab floor will be.
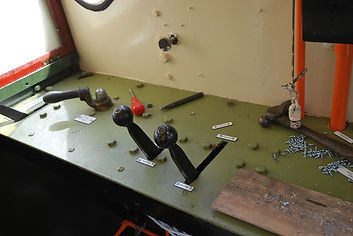

Fitting the tags to the desk, not a job without its trials and tribulations!
1
2
1. Rob, doing his best Roy Orbison impression, while machining the nuts for the 06
2. Closer detail of the machining.
3. A before and after shot of the nuts. Only a small part to work on, but nevertheless all taking the 06 nearer being restored.

3
06/08/16 Due to the War Weekend the restoration report for today is listed on the tab; Photo Pot Pourri, Dont Miss It!!
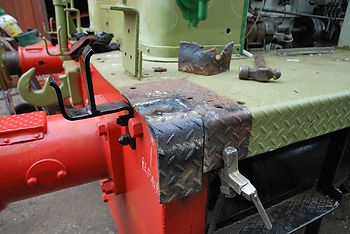
1/08/16. I finished the repair on the left hand front end. (See photos below).
1. Piece of replacement plate welded on the top face.
2. Heated up on the middle for the full width and bent round to the same profile & welded again.
3. Dressed (cut) off to the correct depth weld ground back and cleaned then primed, (Simples!!)
4. First coat of filler applied to the front face of the buffer stock.
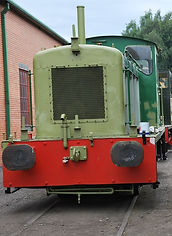
5. View from the 08 before shunting all the "toys" back into the shed!
It just remains now to sand the filler down, fill again and sand where necessary and Job done!

1

2

3
4
5
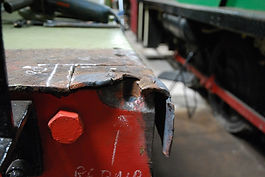
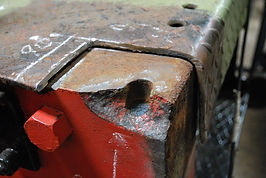
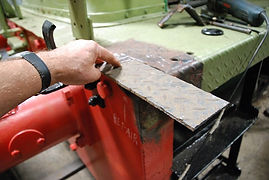
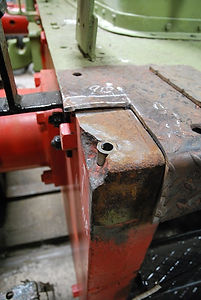
28/07/16 D2205 Repairs to the front left hand corner running board. See 6 photos below.
1. This shows the right hand side in undamaged condition.
2. How the left hand side started out before repair.
3. Damaged piece of running board removed.
4&5, Internally threaded insert made which will be subsequently welded in place, and the damaged piece that is broken away built up with new weld and ground back to the original profile of the buffer beam.
6.Replacement piece of durbar plate material,welded on the top face first to existing plate first, then warmed up and bent round to the same radius (We hope) and then vertically welded on the side face. A hole will then be drilled through the new plate to meet and match the threaded hole underneath it. It only then remains to dress the new plate to the right length, and machine a new hand grip to match the right hand one (See 1st photo) and screw it into place. (Phew!!).


23/07/16, D2205 (Below) again, Shaun and Bob, examining the duplex air guage, basically to see why it's up to 100psi on the loco pressure but its only reading about 50 on the gauge. The bonus is when the gauge panel is removed, it leaves all the gauges in situ on the backplate, unique in our collection to this loco. It certainly has decided it's not going to run properly without a fight!

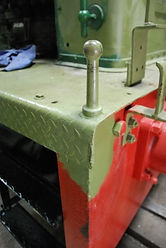
28/07/16 D2205 finished, around a week ago all, the new handbrake grips have been machined to the correct profile and fitted. (These are the unpainted parts).

Ralph Hill, (One of our bright hopes!), fits restored pipework back into the cab of D2420 (The 06), on Sunday the 24th of July.
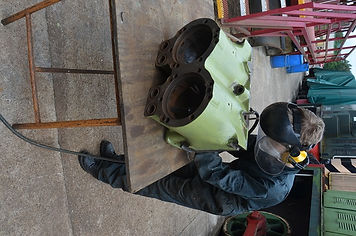
Toby Hill,also on Sunday the 24th of July, (Son of Ralph & also a bright hope!) Hard at work needle gunning a gardner L3 engine block. Needle gunning is a descaling process. Behind every loco restoration, are hours and countless hours of preparation .
3
2

1
4
5
6

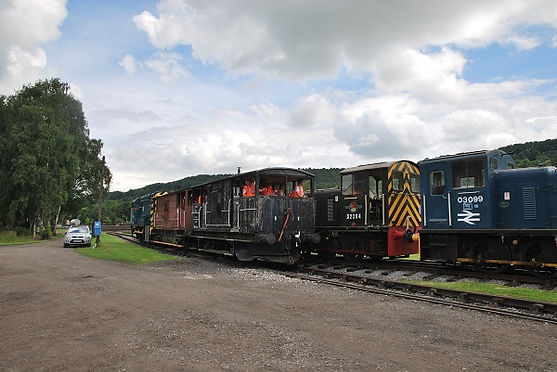
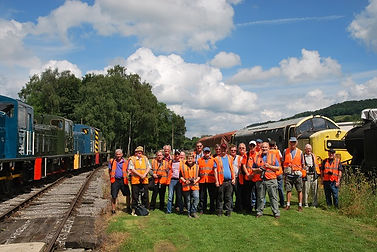
23/07/16 Today saw the annual visit by the Phoenix Railway Group. A ride behind 08016 was organised, and they rode up and down the length of our yard. Complimentary tea and coffee was served after a guided tour of our facilities. It's always nice mixing with fellow enthusiasts, sharing anecdotes and information, anyway here are a few photos of their visit. A good day was had by all !! They made a very substantial donation, and went off on their way to the DRS openday at Crewe.

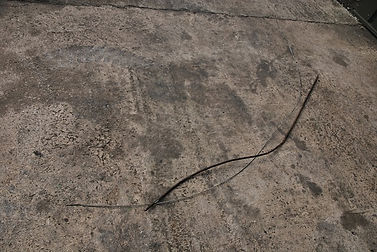
The old throttle cable was removed from D2205 well, if you can call a stiff piece of wire through a copper tube that wasn't secured to the bulkhead, a throttle cable!
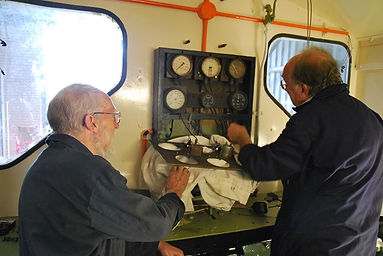
D2205 Last but not least on the 21/07/16, I have spent most of the day, picking out in white undercoat, on all of the air pipes situated under the the desk in the cab. Getting totally engrossed in the music on radio 2 (Well I am 60+), I also started painting the water pipe in white when it should be blue! It's the one in the lower middle, I didn't paint it all, some of it is still in primer. Oh well just another coat of paint! You just wouldn't believe how many hours were spent scraping the remains of the old paint of these pipes before they could be primed. Oh, incidentally the pipes in yellow undercoat are not strictly pipes at all, but conduit which houses wiring, and is waiting for top coat orange.

Thought I would just throw in a shot of the upper part of the cab, above the desk that is, when I was squirming about the floor taking the above shots! If nothing else it shows the completed gauge panels, which are looking quite good! That's all for now folks hope there has been something that has interested you,,
John Wade.


Thursday 21/07/16 D9525
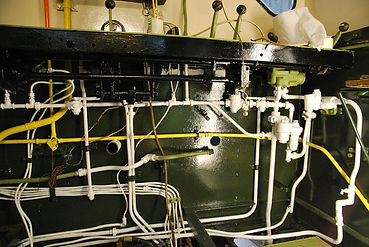
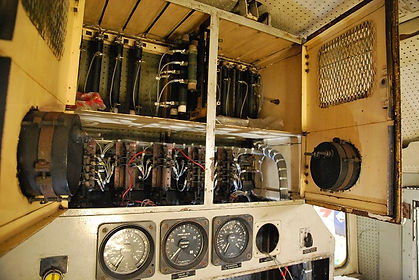
Here we have our newest member, Dave T, who has taken to the job in hand, like a duck to water!! A chance meeting in the carpark @P.Rail led to an invitation to join our group, Dave said he would like to give it a try, and less than 2 months later he is rewiring our resident class 14!! He is doing an absolute marvellous job and the only problem we seem to have is getting Dave to stop for a break! He really is a "manna from heaven" (read God send), yes you get the idea. The upper and lower cubicle panels are now well on the way to completion as you may be able to see from the Photos that were taken today.

Also taken today (21/07/16) is a shot of the brand new exhaust silencer for the 06, D2420 this has been professionally made, by a fabrication company and has just received a coat of heat resistant aluminium paint. Like all exhausts, they need replacing once in a while, I have found with Drewry's in occasional use this will be approximately every 30 years, so not so bad is it?

Detail, showing the new running boards, fitted to our guardsvan over the past few weeks. Thanks to Shaun Doughty.
The 06 has its gearbox reunited in the loco. You trying doing this one without a forklift truck!! (12/07/16)
